In this scenario, we want to send the data from a form that is hosted in our Website to a Marketing Cloud data extension.
We will achieve this in three simple steps:
1- We create a Data extension:
Since our goal here is simply send the information to Marketing Cloud we will create a non sendable data extension. We will create five fields: First Name, Last Name, Email, Interest and gender.
Once our data extension is ready, we will save both the name of the DE and of every field that we create for this.
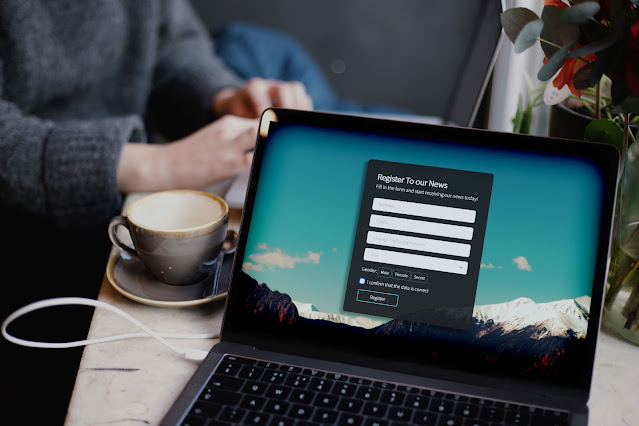
2- We build our form
The structure of our form shouldn't be too complicated. Technically, the only thing that we will need is a post request and the action of the post request pointing to a Thank You Page that we will be hosting on Marketing Cloud.
Once we have that settled we need to ensure that the names of our fields will match the requests we will use afterwards to get the parameters in our Thank You Page. This is a simple structure of how our form could look like:
<!DOCTYPE html>
<html lang="en">
  <head>
    <meta charset="utf-8">
    <title>Registration Form</title>
  </head>
  <body>
    <form  action="thankyoupagehostedinMC" method="post">
      <label for="firstname">First Name
      <input type="text" name="firstname">
      </label><br>
      <label for="lastname">Last name
        <input type="text" name="lastname">
      </label><br>
      <label for="email">Email Address
        <input type="email" name="email">
      </label><br>
      <label for="interest">Interest:</label>
        <select id="interest" name="interest">
          <option value="footwear">Footwear</option>
          <option value="Gear">Gear</option>
          <option value="Electronics">Electronics</option>
        </select><br>
      <p>Gender:</p>
      <div>
        <input type="radio" id="male" name="gender" value="male"
               checked>
        <label for="male">Male</label>
      </div>
      <div>
        <input type="radio" id="female" name="gender" value="female">
        <label for="female">Female</label>
      </div>
      <div>
        <input type="radio" id="secret" name="gender" value="secret">
        <label for="secret">Secret</label>
      </div>
      <button type="submit" name="button">Register</button>
    </form>
  </body>
</html>
3- We build a Thank You Page hosted in Marketing Cloud.
For the AMPSCRIPT we will be using two functions:
1- Request Parameter is the function that will allow us to get the information from the post request into different variables that we will send into the data extension.
2- Insert DE is the second function that will serve us to inject these variables into our Data extension.
We will use an If Statement, first to ensure we only insert data into a data extension when there is data available to insert, but also to display a different message if the submission is successful or not.
Our code will end up looking like this:
%%[

SET @firstname = RequestParameter("firstname")

if not empty(@firstname) then

  InsertData(
        "RegistrationsNTO",
        "FirstName", @firstname,
        "LastName", RequestParameter("lastname"),
        "Email", RequestParameter("email"),
        "Interest", RequestParameter("interest"),
        "Gender", RequestParameter("gender")
       )
  set @tymessage = "Thank you for your information"
  set @tymessage2 = "We will contact you soon"

  else

  set @tymessage = "Unfortunately we couldn't process your inquiry"
  set @tymessage2 = "Please try again later!"

ENDIF

]%%
Finally, the only thing that we need is to build the variables for the two different thank you responses in the body of the HTML:
<div class="form-items">
  <h3>%%=v(@tymessage)=%%</h3>
  <p>%%=v(@tymessage2)=%%</p>
</div>
Now, I created a whole code built in Bootstrap 5 that's easy to replicate.
You will find it here.
Interested in using it? Then follow this simple steps:
1- Replace the logo with a 200px width .png file
2- Replace the background with a 2400x1600px for web optimized image.
3- Replace Favicon with a 16x16 png file or simply delete it both for the index
and thank you page.
3- Change fonts and colors
4- Link the Thank You Page to a style sheet.
Do we have other Alternatives to send information to MC?
The answer is always. I can think of two other simple alternatives.
DE Manager, a code already built by Salesforce to use as action for the post request.
SmartCapture: This option, might be a bit more complex, but basically you can build a SmartCapture as a CloudPage and then I frame it to add it to your website. The advantage you would gain with it is that once you have it, you can add the data into a Journey and send a Thank You message.
Anyway, that's it for now! Feel free to leave me any comment, and if you're interested in using my repository, I'd be more than happy to solve any questions you might have!


Do we have other Alternatives to send information to MC?
ReplyDeleteTel-U